Installation
![]()
IMPORTANT INFORMATION BEFORE STARTING
It is very important to carefully follow the installation instructions entirely during the installation of the product.
The Genuine 3M adhesive tapes on the product are extremely strong and will only allow you to lay the spoiler in place for one installation only.
If in doubt, please do not hesitate to contact our customer service:
833-772-5777 Monday to Saturday 8am to 8pm Eastern Time
Notes
The BridgeSport™ Utility Spoiler is designed to carry one ladder or other long objects. Please use with caution.

“Roof surface must be warm to the touch”
The product must be only installed at ambient temperature of 60 ºF to 77 ºF / 15 ºC to 25 ºC. We recommend to avoid automated car washes due to their harmful solvents. We recommend to periodically check the spoiler for tightness.
NO TOOLS REQUIRED
Content
| Spoiler x 1 |  |
| Alignment Stickers x 5 | 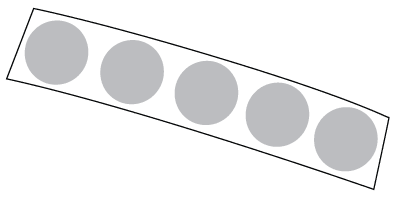 |
| Alcohol Pad x 1 | 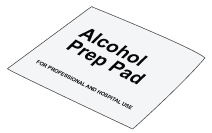 |
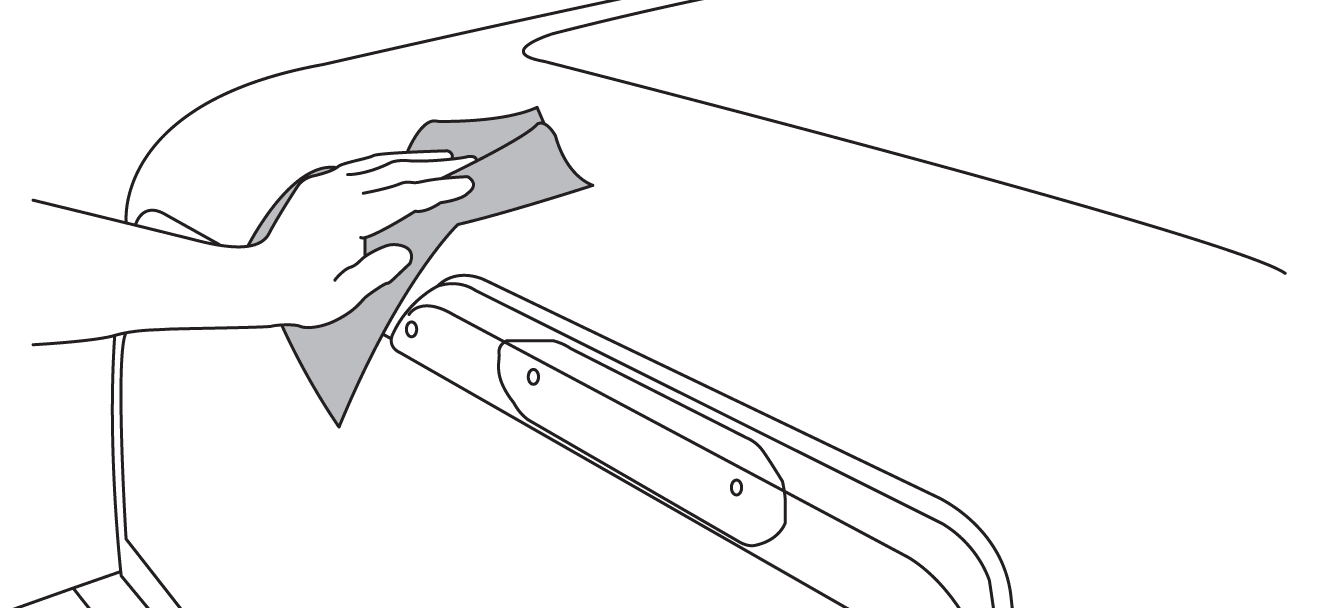
Step 1
Clean the area of the roof where the spoiler will be in contact with the surface using only soap & water and dry with a clean cloth.
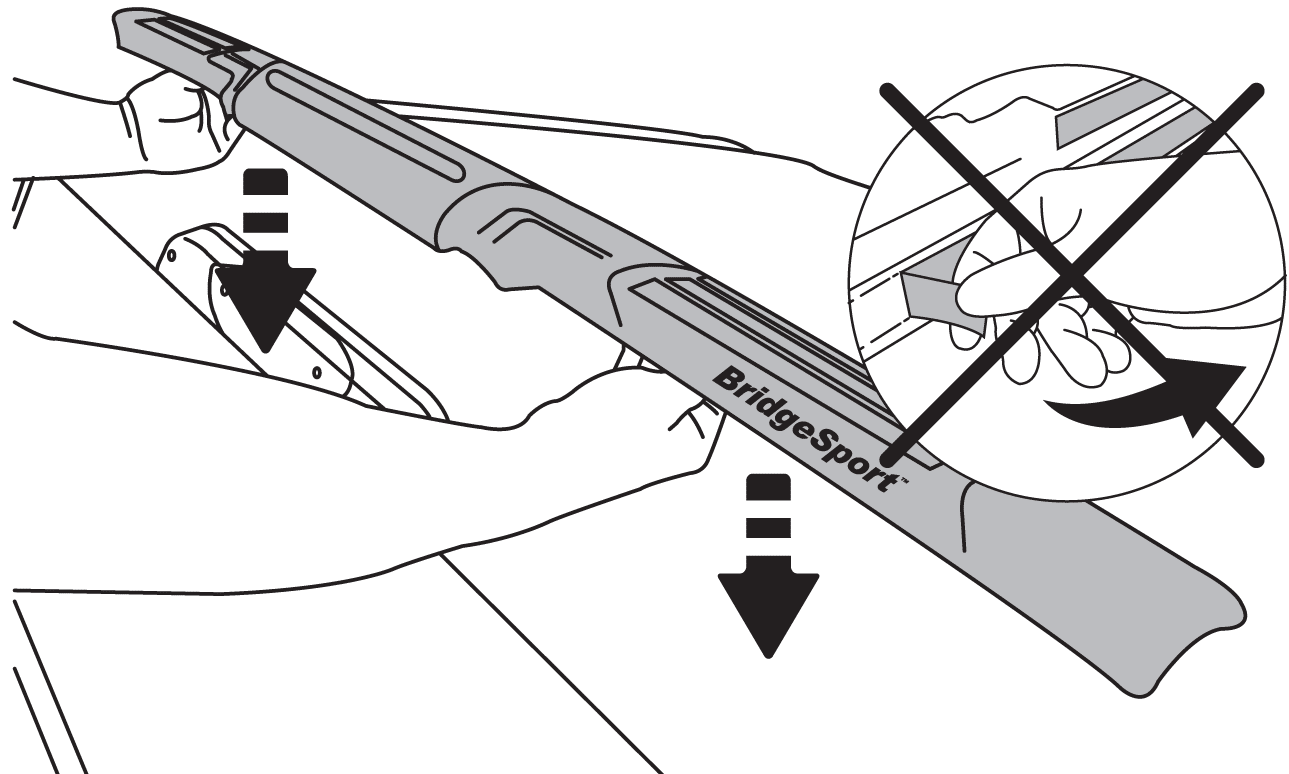
Step 2 – Test fit
Test fit the spoiler onto the roof area.
Do not remove the red protective film on the adhesive tape for this step.

Step 3
Align the spoiler with the same spacing on each side of the Cab’s Brake Light. Also ensure the same gap between each ends of the spoiler and the upper edge of the rear window in order to have the spoiler leveled.
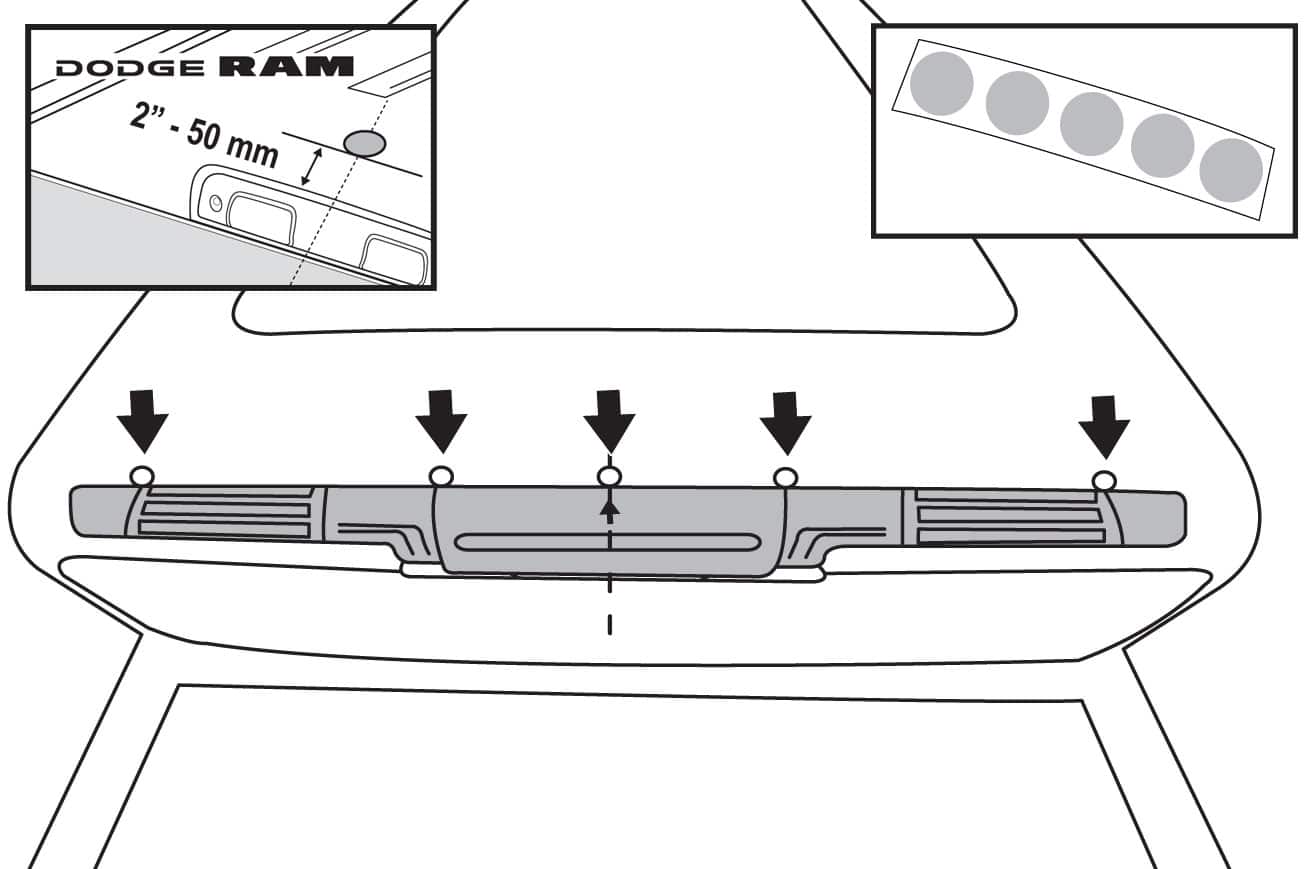
Step 4
While applying pressure on the spoiler, install the 5 alignment stickers to the front edge of the spoiler to mark locations. Starting at the center, aligned with the spoiler’s arrow.
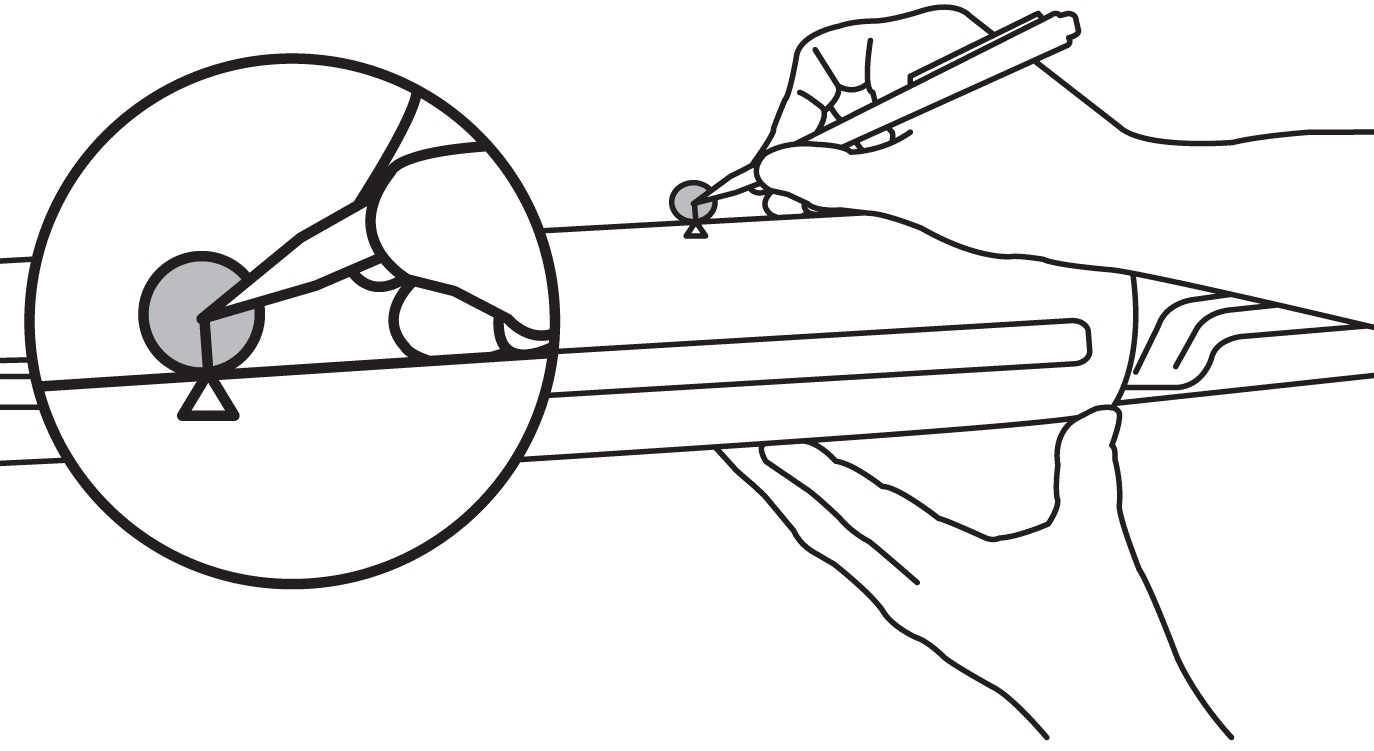
Step 5
While applying pressure on the spoiler, pencil in, a line on the central alignment sticker in line with the arrow at the center of the spoiler to ensure its ultimate reference location during final installation.
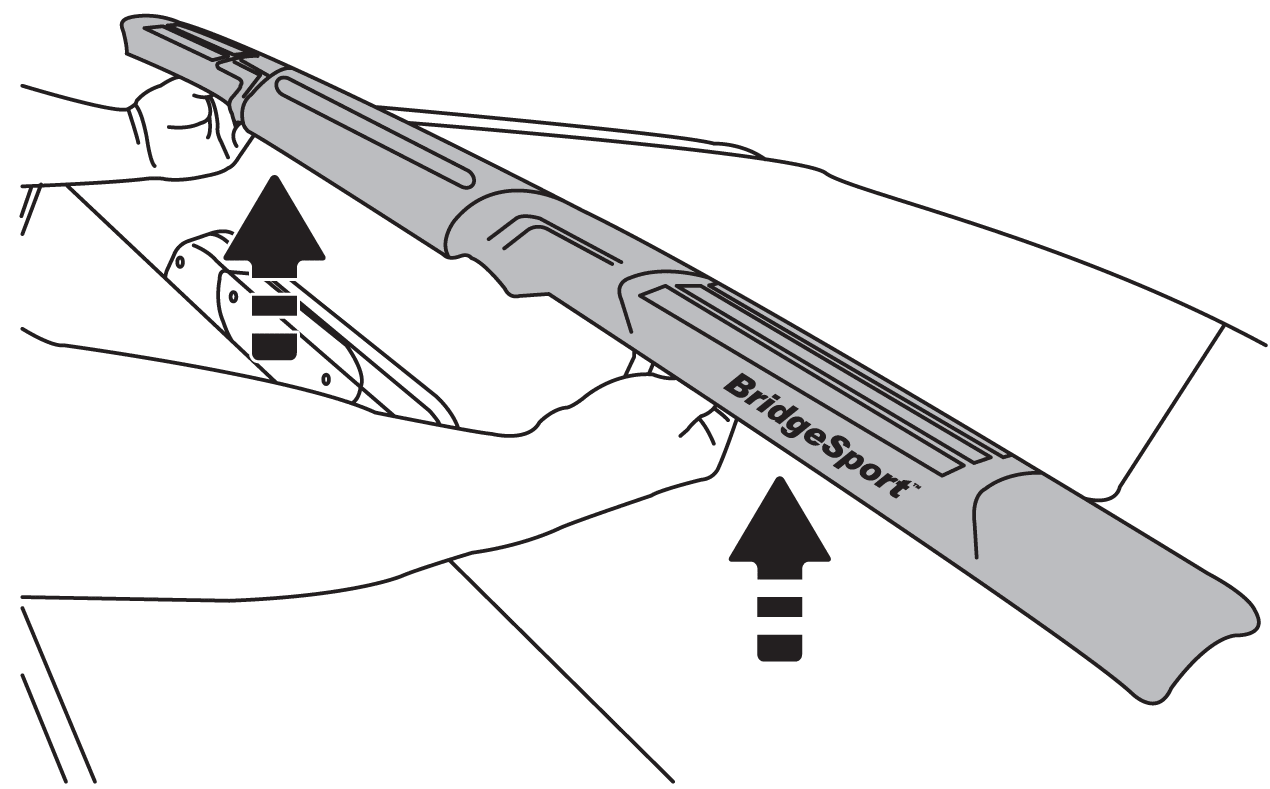
Step 6
Remove Spoiler.
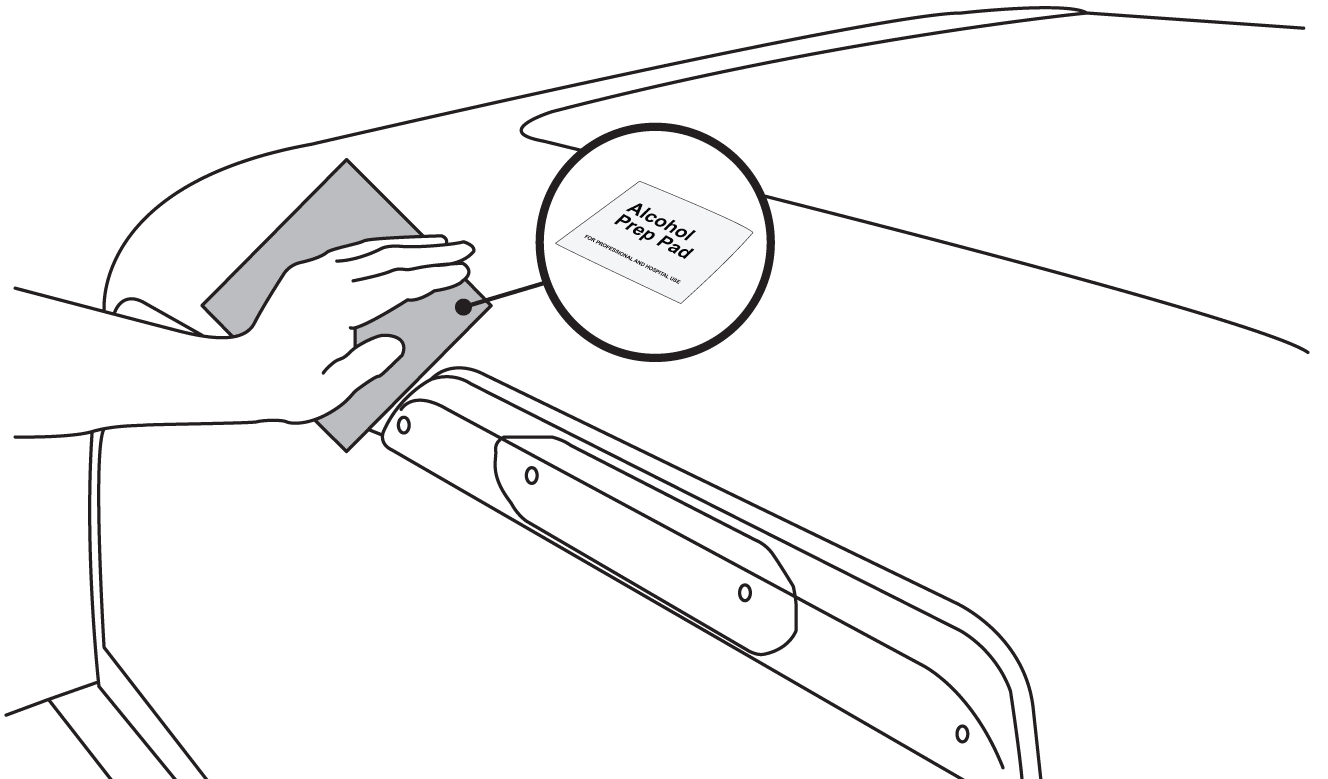
Step 7
Using the supplied alcohol pad, clean the area of the roof where the spoiler will be in contact in order to ensure that the surface is clear of all contaminants (Oily film and/or Wax) for a proper installation of the spoiler.
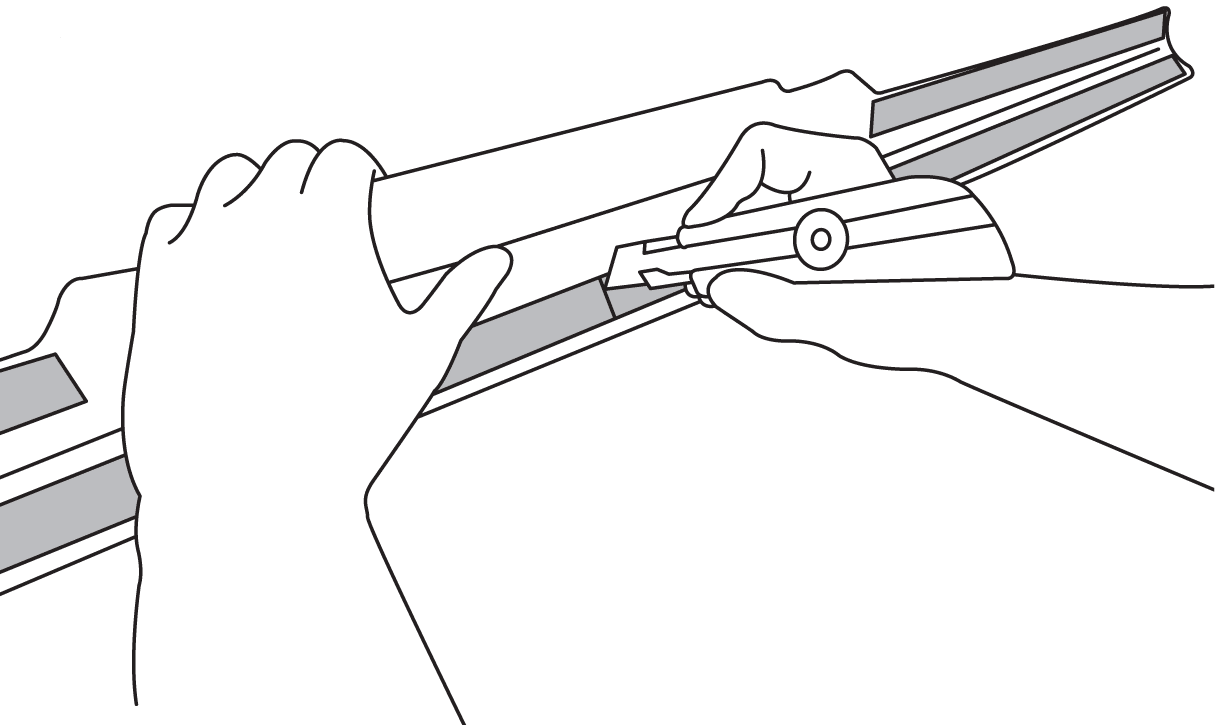
Step 8
Carefully cut the front edge, red protective film (liner) at the center, inline with the spoiler top arrow.
* This cut may already be in place for some models.
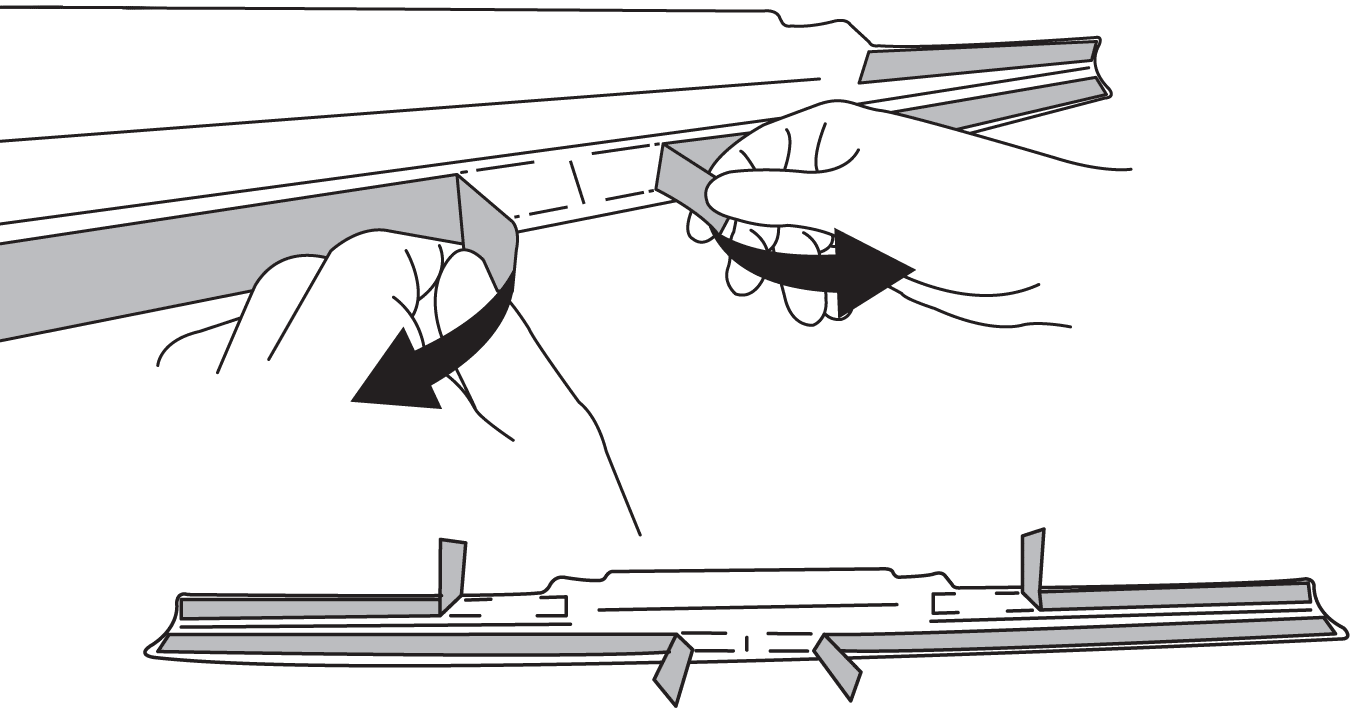
Step 9
Peel back approximately 2” in / 50 mm of each inner edges (4) an angle on each side in order to be able to grab them once the spoiler is placed on the roof.
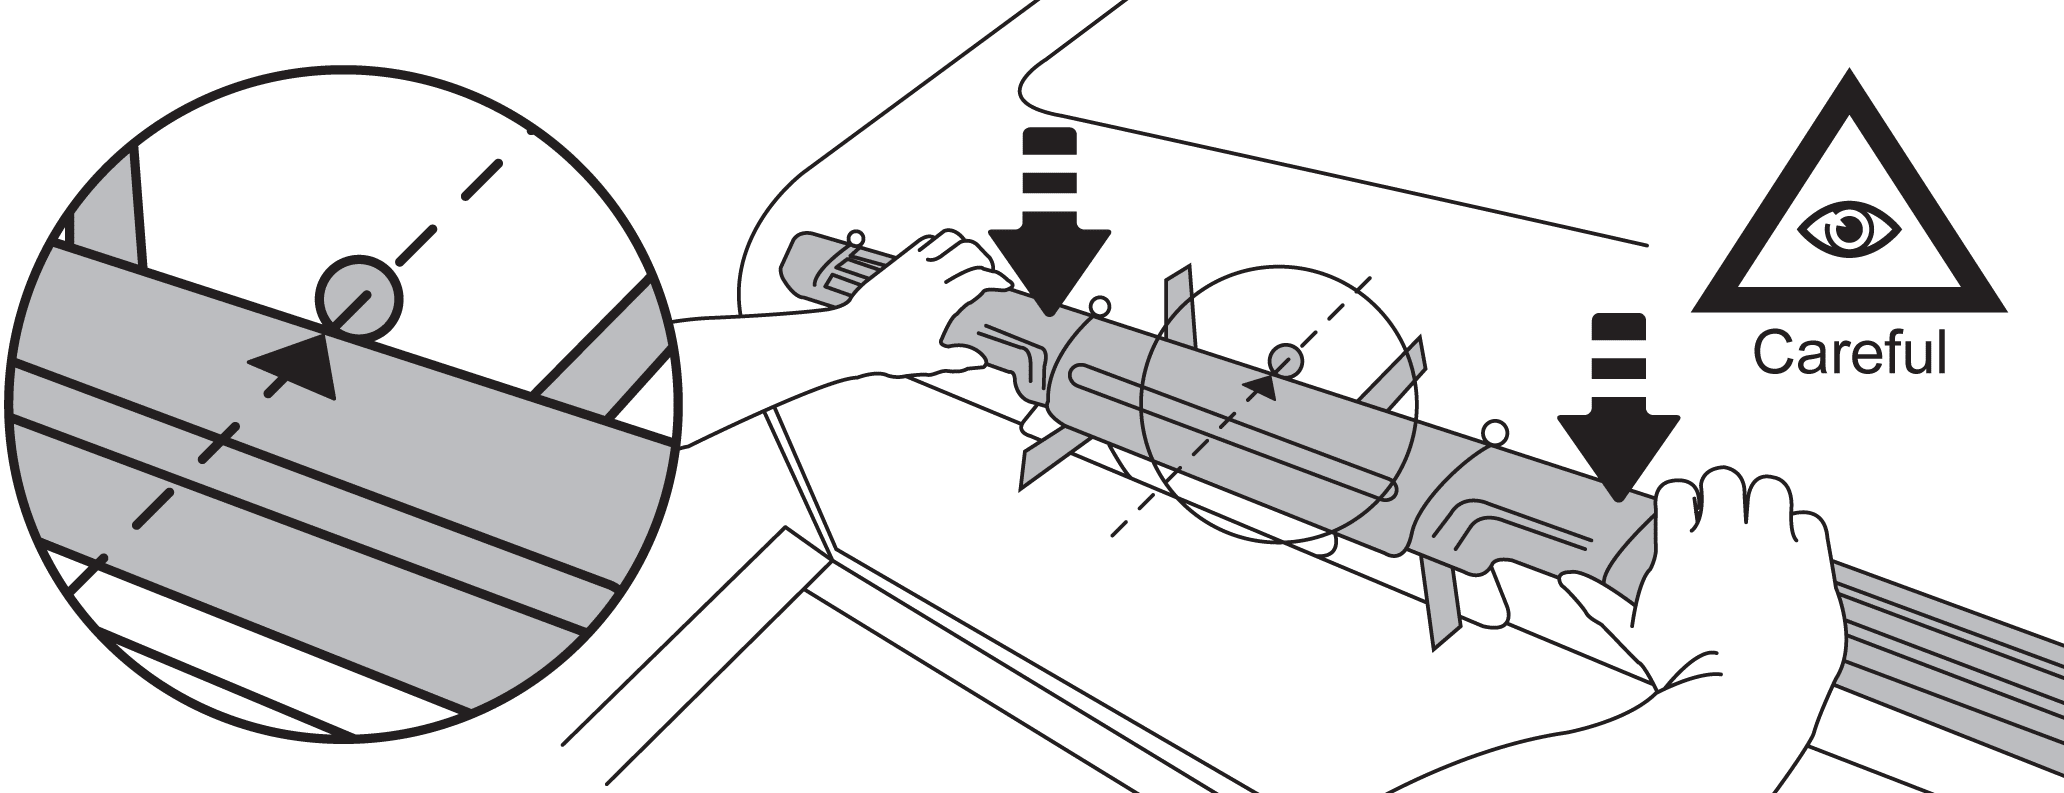
Step 10
This is the most important step as you will have only one attempt to perform it due to the strength of the 3M tape.
Carefully align, both, the arrow on the spoiler and the line on the center alignment sticker, as well as, the front edge of the spoiler with all the other alignment stickers while carefully placing the spoiler onto the roof.
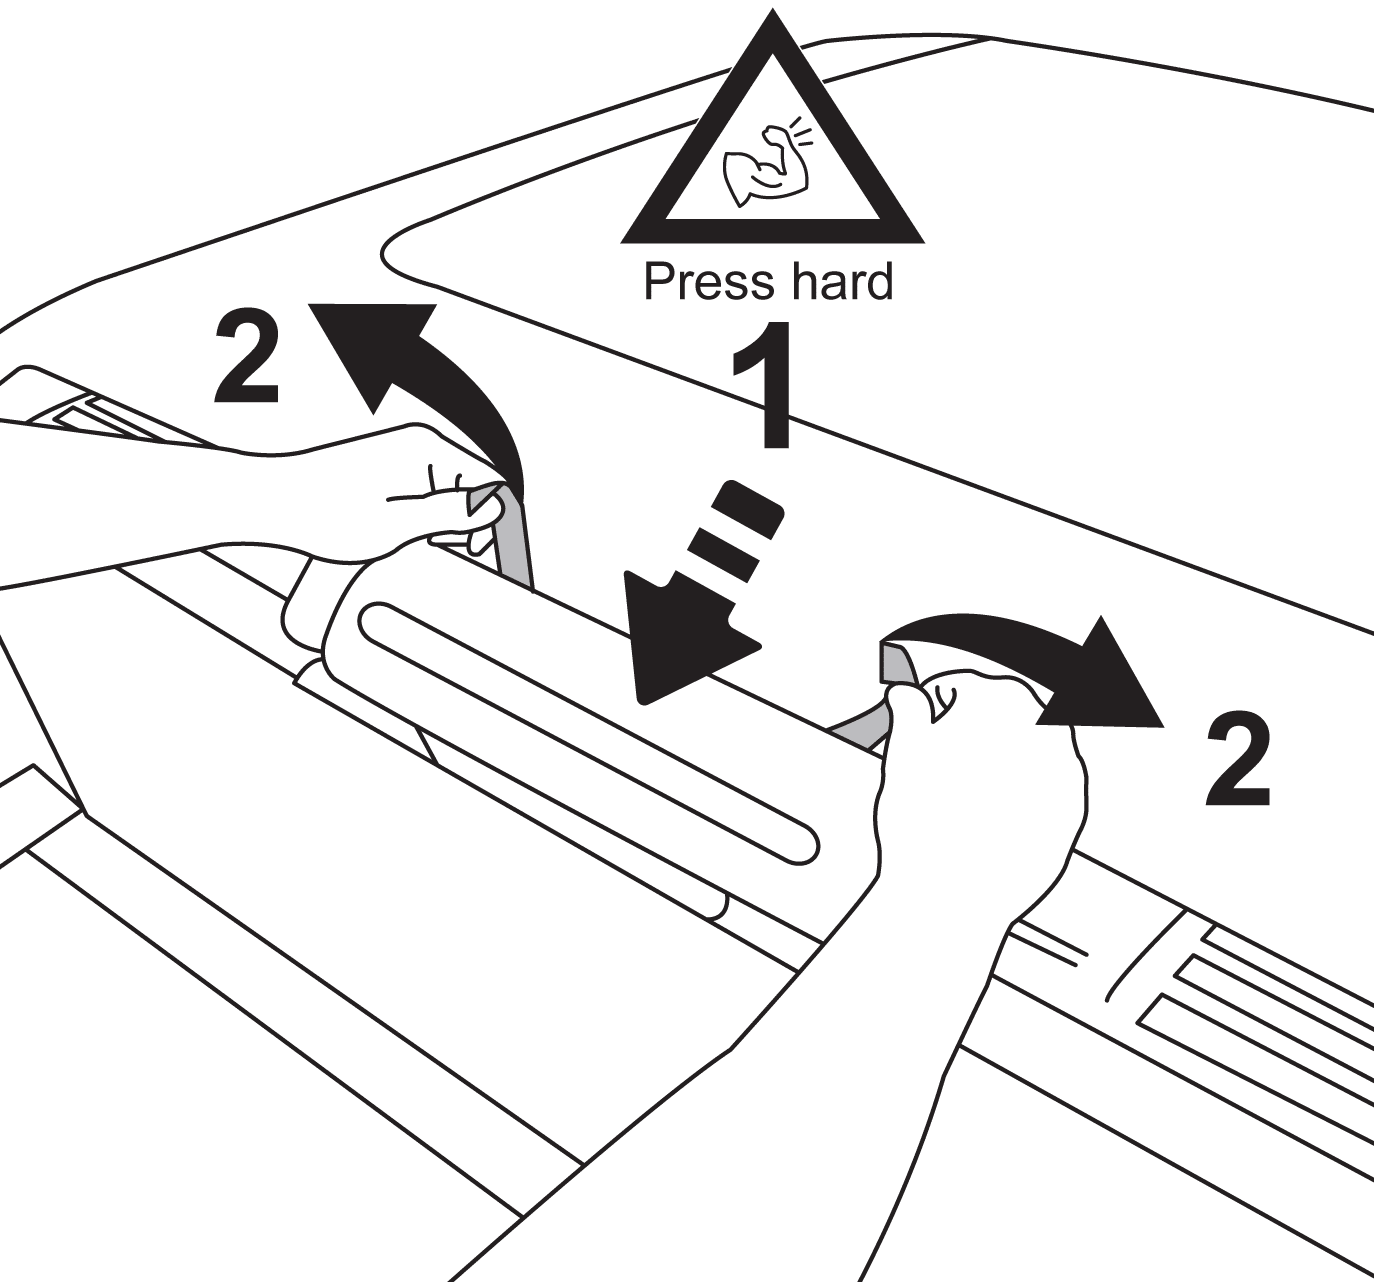
Step 11
1. Once the front middle section is properly located in place, apply pressure at center area in order to secure it to the roof.
2. Once the center portion is firmly secured, proceed by slowly peeling the upper red tape liner away while keeping the spoiler aligned with the other alignment stickers.
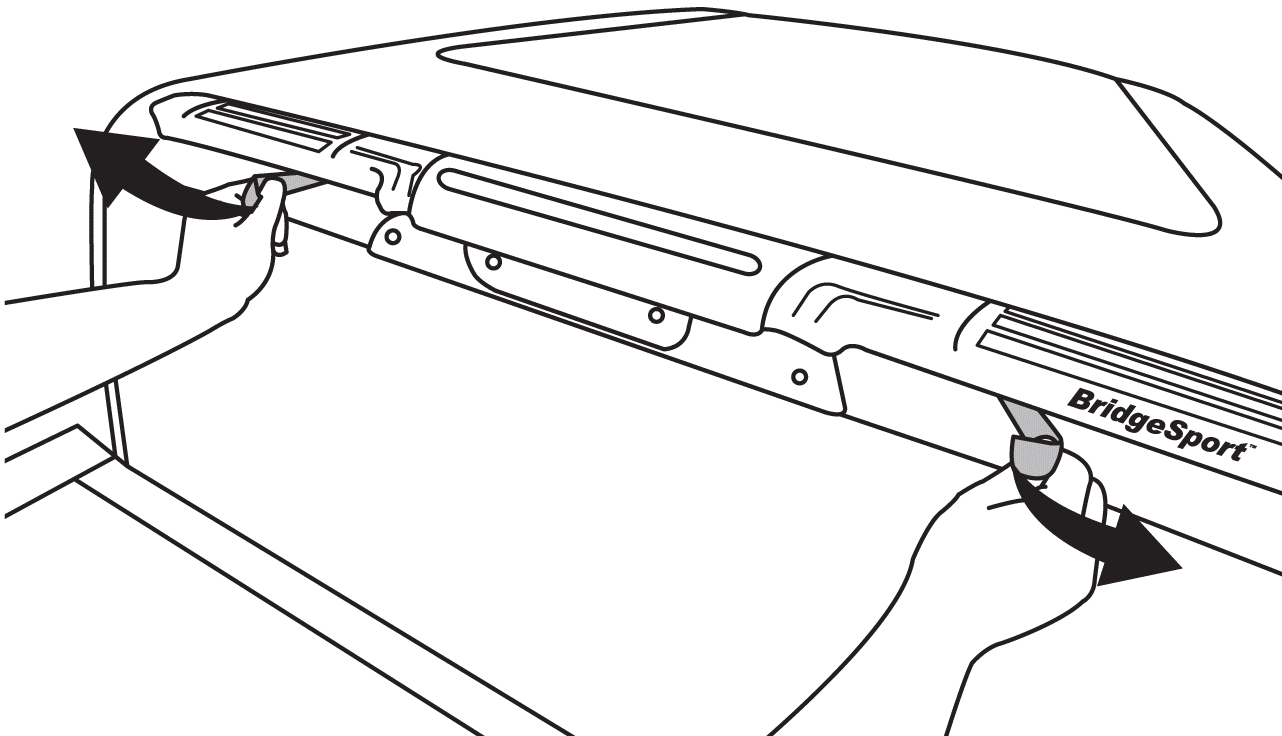
Step 12
Proceed by slowly peeling the lower red tape liners from middle towards the ends.
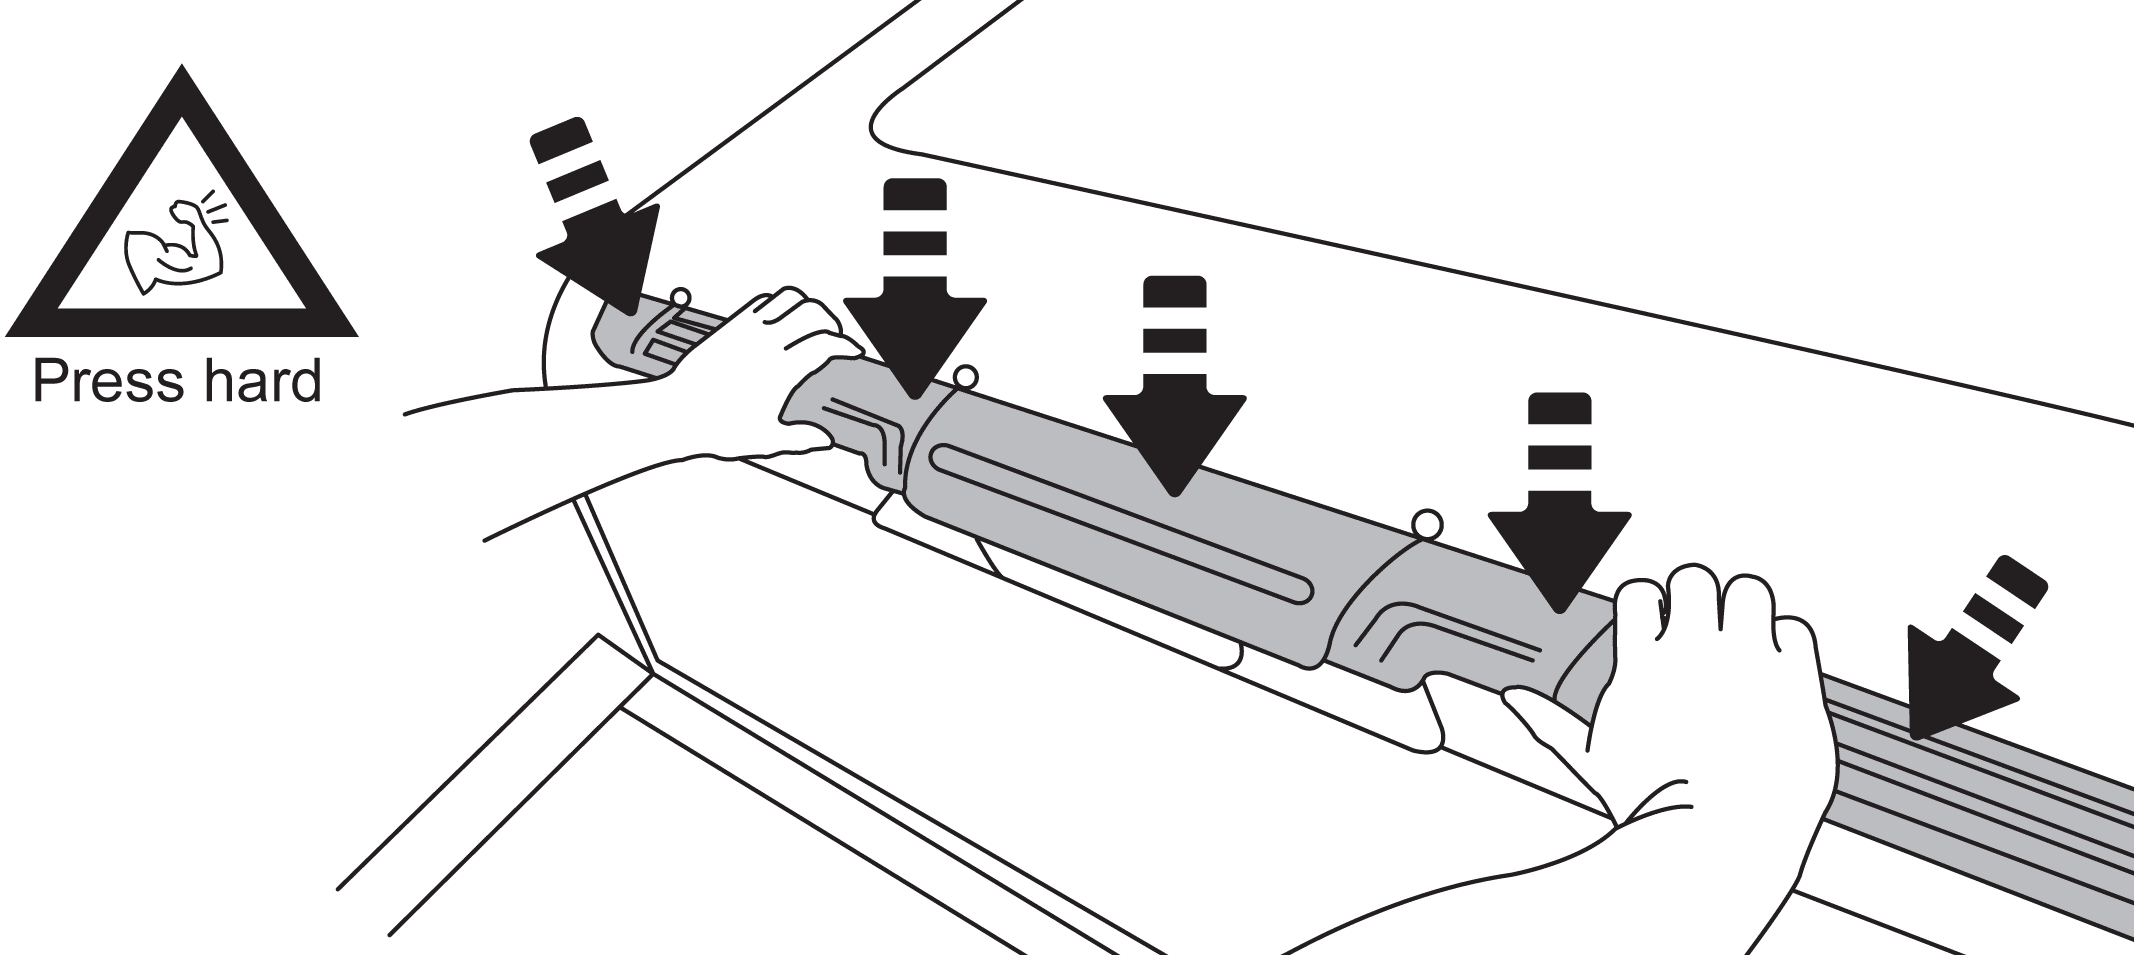
Step 13
Once the spoiler is all in place, apply a good pressure all around the spoiler to ensure that all adhesive tapes are in proper contact with the roof’s sheet metal.
We recommend that all objects (Ex.: Ladder, Lumber, Kayak…) should be secured to the vehicle using proper tie-down straps. The straps should always be wrapped once, all the way around the item(s) before being secured down to the vehicle’s lower factory (OEM) tie-down hooks inside the truck’s box.

Thank you for choosing our BridgeSport™ product. We take utmost pride in providing you with a quality, durable & stylish product.
LIMITED LIFETIME WARRANTY:
The BridgeSport Limited Lifetime Warranty covers all defects in materials or workmanship, products properly installed per provided instruction. This warranty is granted as long as the original retail purchaser owns the vehicle on which the product is installed and is not assignable or otherwise transferable. Proof of purchase will be required. The warranty expires if the product is removed from the original vehicle or if the original vehicle is transferred to another owner. No warranty is given for defects resulting from conditions beyond BridgeSport’s control including, but not limited to, defects caused by normal wear and tear, scratches, vehicle’s damages caused by overloading, or failure to mount or use the product in accordance with BridgeSport’s written instructions or guidelines included with the product or made available to the purchaser via online website. Final decision regarding any claim to be determined solely by BridgeSport discretion.
